Portuguese Kimchi?! Homestead update & new recipe!
This week was another great one for farm development! But that was not all, we also got to enjoy the fruits of last week’s experiment which we show you at the end of this recipe. New life on the homestead in Portugal and an update on our seedlings. We hope you enjoy!
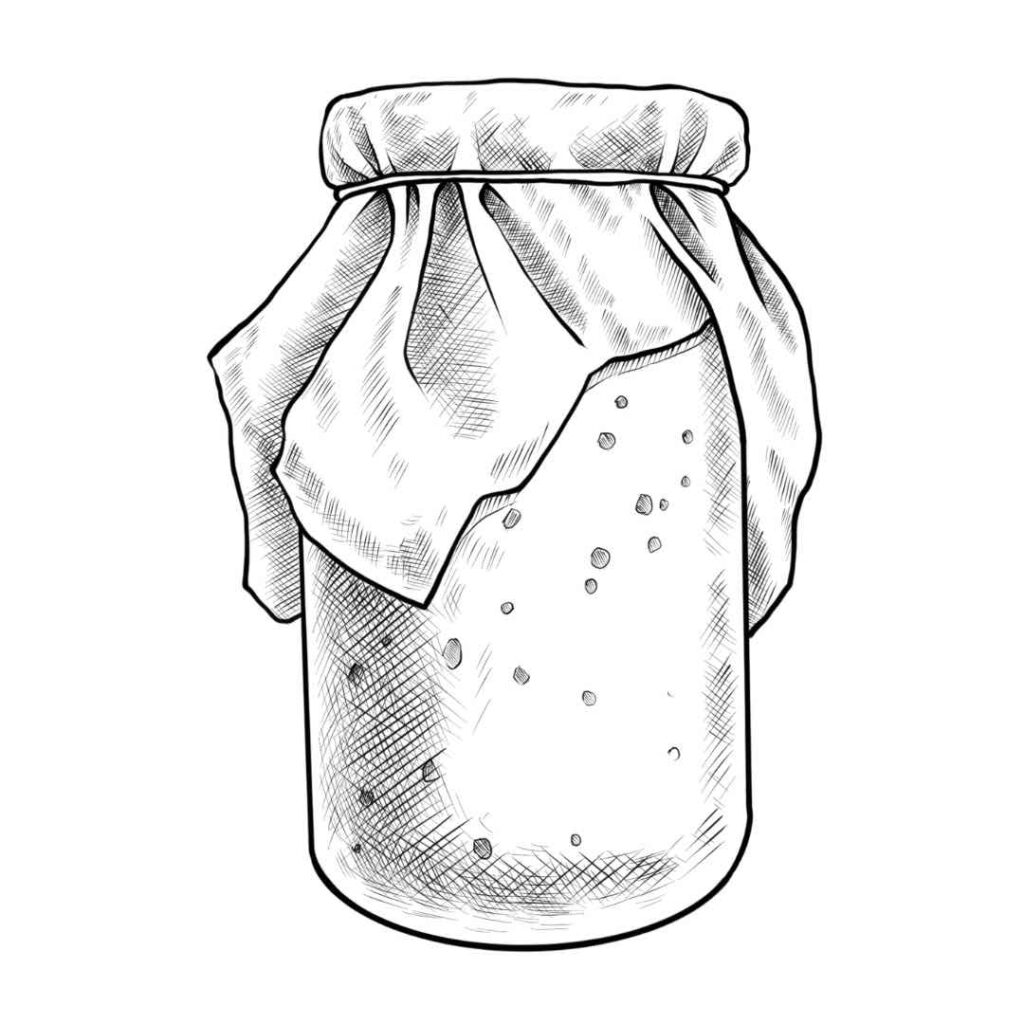
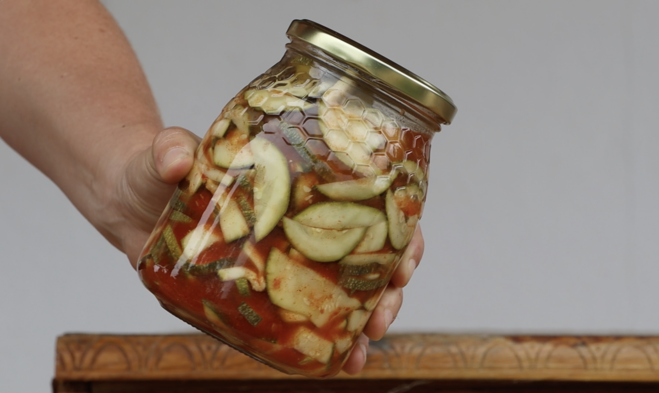
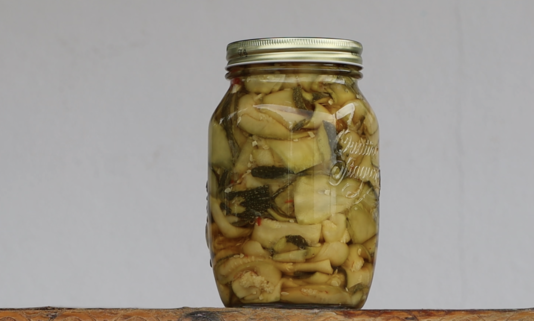
Portuguese Kimchi
SALT in fermentation
In lacto-fermentation, salt plays a crucial role in the fermentation process by creating an environment that encourages the growth of beneficial bacteria (lactic acid bacteria) while inhibiting the growth of harmful bacteria. The salt percentage used in lacto-fermentation can vary depending on factors such as the type of vegetable or dairy product being fermented, personal preference, and specific recipe requirements.
Typically, the salt percentage used in lacto-fermentation ranges from 1.5% to 5% of the total weight of the ingredients. However, it’s essential to note that the precise salt percentage can significantly impact the fermentation process and the final flavor and texture of the fermented product.
Here’s how salt affects lacto-fermentation:
Inhibits harmful bacteria: Salt creates an environment that inhibits the growth of harmful bacteria, including spoilage bacteria and pathogens. This helps to prevent food from spoiling during the fermentation process and ensures its safety for consumption.
Encourages lactic acid bacteria: While salt inhibits harmful bacteria, it also encourages the growth of beneficial lactic acid bacteria, such as Lactobacillus species. These bacteria naturally occur on the surface of vegetables and dairy products and are responsible for fermenting sugars into lactic acid, which preserves the food and gives it a tangy flavor.
Controls fermentation speed: The salt percentage used in lacto-fermentation can influence the speed at which fermentation occurs. Higher salt concentrations can slow down the fermentation process, allowing for a longer fermentation period and potentially resulting in a firmer texture. Lower salt concentrations may lead to faster fermentation and a softer texture.
Affects flavor: The amount of salt used in lacto-fermentation can also impact the flavor of the final product. Too little salt may result in a bland or overly soft ferment, while too much salt can make the ferment overly salty. Finding the right balance of salt is essential for achieving the desired flavor profile.
Useful guidelines
Proper storing of lacto-fermented foods is crucial for maintaining their quality and safety. After the fermentation process is complete, transfer the lacto-fermented food, whether it’s vegetables or dairy products, into clean, airtight containers such as glass jars or crocks. Ensure that the fermented food is fully submerged in its brine or liquid to prevent exposure to air, which can lead to spoilage. Store the containers in a cool, dark place, such as a pantry or refrigerator, to slow down further fermentation and preserve the flavor and texture of the fermented food.
Directions
Ingredients
1 kg Portuguese Christmas cabbage stems
1-2 tablespoons sea salt (2% weight of ingredients)
3-4 cloves
6-8 whole black peppercorns
2-3 bay leaves
- optional : ginger, cilantro, tomato flake powder
Tools
- Large mixing bowl
- Clean quart-sized glass jar with lid
- Weighting device (e.g., smaller jar, clean stone)
Simply follow these steps in order to make Portuguese Kimchi:
Prepare & Season: Rinse and slice the cabbage stems thinly. In a bowl, mix cabbage with salt, cloves, peppercorns, and bay leaves. Massage for 5-10 minutes.
Pack & Press: Transfer cabbage into a clean jar, pressing down firmly to remove air pockets. Add any liquid. Place a weighting device on top to keep cabbage submerged.
Ferment: Loosely cover jar. Store in a cool, dark place. Check every day, pressing down on weight. Skim off any foam. Taste after 1-2 weeks.
Refrigerate: Once desired sourness is reached, move jar to fridge to slow fermentation. Enjoy as a side dish or condiment!
Roast Beef
Ingredients
- 2-3 kg beef roast (such as sirloin, ribeye, or tenderloin)
- Salt and pepper, to taste
- Olive oil
Tools
- Meat thermometer
- Roasting pan
Wire rack
Useful guidelines
Delta cooking
“Delta cooking” is a method used in roast beef making to achieve a specific level of doneness throughout the meat. It involves cooking the beef at a higher temperature initially to sear the exterior and develop flavor, then lowering the temperature to cook the interior evenly without overcooking the outer layers.
The term “delta” in this context refers to the temperature difference between the initial searing phase and the subsequent slower cooking phase. By searing the beef at a high temperature first, you create a flavorful crust on the outside, which also helps to lock in juices. Then, by reducing the temperature for the remainder of the cooking time, you allow the heat to penetrate evenly into the center of the roast without overcooking the exterior.
This method is often used for larger cuts of beef, such as roasts, to ensure that the meat is cooked to the desired level of doneness while still maintaining a juicy and tender texture throughout. It’s a great technique for achieving a perfectly cooked roast beef with a flavorful crust and succulent interior.
Storage
Refrigerate promptly: After cooking, allow the roast beef to cool down to room temperature for no more than 2 hours, then refrigerate it promptly. Bacteria multiply rapidly at room temperature, so refrigeration slows down their growth.
Use airtight containers or wrap: Store roast beef in airtight containers or wrap it tightly in plastic wrap or aluminum foil to prevent air and moisture from getting in. This helps maintain the meat’s moisture and prevents it from drying out.
Store in the fridge: Place the roast beef in the refrigerator within two hours of cooking. Store it on the bottom shelf or in the coldest part of the fridge, where the temperature is most consistent. Proper refrigeration helps prevent bacterial growth and keeps the meat fresh.
Directions
Simply follow these steps in order to make a great roast beef:
Preheat Oven: Preheat your oven to 180°C (350°F).
Prepare the Roast: Pat the beef roast dry with paper towels. Rub the roast generously with salt, pepper, and a drizzle of olive oil or vegetable oil.
Roasting: Place the seasoned roast on a wire rack in a roasting pan, fat-side up. This allows air to circulate around the meat, promoting even cooking. Place the roasting pan in the preheated oven.
Cooking Time: Roast the beef until it reaches an internal temperature of 55-57°C (130-135°F) for medium-rare. This usually takes about 20-25 minutes per 500g (1 lb) of meat, but it’s important to use a meat thermometer to check for doneness.
Check Doneness: About 15-20 minutes before you expect the roast to be done, start checking the internal temperature with a meat thermometer inserted into the thickest part of the roast. Aim for a final temperature of 60°C (140°F) for medium doneness. Keep in mind that the temperature will rise a few degrees as the roast rests.
Resting: Once the roast reaches the desired temperature, remove it from the oven and transfer it to a cutting board. Tent the roast loosely with aluminum foil and let it rest for 15-20 minutes. This allows the juices to redistribute throughout the meat, resulting in a juicier roast.
Carving: After resting, slice the roast against the grain into thin slices.
Directions
Simply follow these steps in order to make this delicious sauce:
Prepare Ingredients: Mince the garlic cloves and finely chop the fresh parsley.
Mix: In a bowl, combine the plain yogurt, minced garlic, chopped parsley, and lemon juice. Stir until well combined.
Season: Season the sauce with salt and pepper to taste. Adjust the seasoning according to your preference.
Chill: Cover the bowl and refrigerate the sauce for at least 30 minutes to allow the flavors to meld together.
Serve: Once chilled, give the sauce a final stir and taste for seasoning. Serve the garlic and parsley yogurt sauce as a condiment or dip with your favorite dishes. Enjoy!
Yoghurt and Garlic sauce
Ingredients
1 cup plain yogurt
2 cloves garlic, minced
2 tablespoons fresh parsley, finely chopped
1 tablespoon lemon juice
Salt and pepper, to taste
Tools
1 cup plain yogurt
2 cloves garlic, minced
2 tablespoons fresh parsley, finely chopped
1 tablespoon lemon juice
Salt and pepper, to taste
Fermented Vegetables

Recipe Categories


Fermented Vegetables
Recipe Categories